|
Wet Effects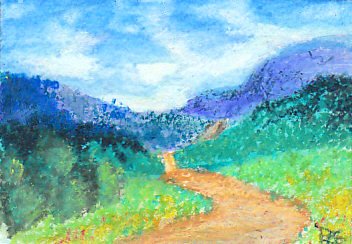
Wet Effects are easier with watersoluble oil pastels because your wash medium is just water. Hills Road is a small 2 1/2" x 3 1/2" landscape that I started for the Underpainting demo in "Techniques" over on the left side nav bar. I knew that I would do something interesting with it, then decided it would be perfect to continue demonstrating water related techniques. I've used several along the way to completion of this tiny painting. You can see them at the different stages below. Wet effects with other oil pastels are similar, the biggest difference is using oil painting mediums like odorless turpentine, Liquin alkyd medium or linseed oil to dissolve the pigment and spread it in a painterly way. I contrasted some dry effects in the final layers so as to show the variety of textures you can achieve in a single painting.
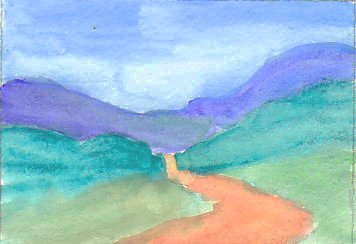
Above is my original underpainting for Hills Road. As a watercolor it's not great. It's primarily just a coloring-book area by area fill-in with blue sky, purple distant hills, green foreground hills and Burnt Sienna road so that when I add oil pastels, the little flecks that show through from paper texture aren't far from the colors I'm putting over them. Or alternately, contrast in a pleasing manner. The first wet effects technique I used on this started with a loose application of Cretacolor Aqua Stic watersoluble oil pastels into the sky in the painting. This first layer is very light, I did not try to fill in heavily because I knew I'd wash right over it and dissolve the oil pastel.
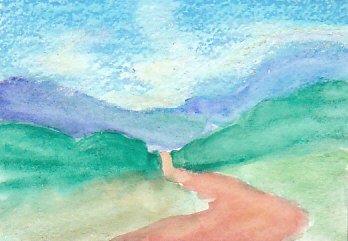
I worked on the sky first and ignored the rest of the painting because in any drawing or painting, it helps to work background toward foreground. For one thing if this were any bigger, it means I wouldn't be dragging my hand over finished areas to work on background stuff. In addition to white, I used lavender, pink and pale yellow to give some color variation to the clouds. Clouds look livelier and more natural when you add subtle hues that come close to white. Next, I used a size 6 round Golden Taklon watercolor brush to wash over the sky carefully for my first wet effect. I began with the clouds so that I would not drag dissolved blue into the lightest areas. I dipped the brush in clean water and wiped the point on a cloth so that it was not dripping but still loaded. Less water is better for small areas and tight washes. You can always add more but it's hard to control runs if you use a lot of water. Runs are exactly what they sound like -- drips of water or paint that run down into areas below the one you're working on. Watercolor artists use them for deliberate effect, tilting the board to create runs that go where they want to. That's one wet effect that takes a lot of practice and gives unpredictable results even to professional watercolorists. Thus I keep my wet effects down to simple washes over distinct areas of color for more control. The choice is yours. If you're good at watercolors any watercolor effect can be combined with oil pastels in mixed media or used in a wet effects painting. Below is the second step, the sky is now washed. Working outward from the clouds I blurred their edges into the blue parts of the sky.
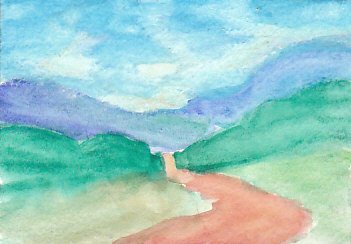
After doing the initial washes on the sky, I decided the clouds should be stronger. One of the more dramatic wet effects is just to dip the stick into water and draw with it. So I took the white stick, dipped it and drew a little on the margin of the painting to get the color good and mixed in, then drew with the softened tip on the clouds. Direct wet-stick application produces strong color and a bead of thick paint on the surface of the work. This layer took longer to dry than the preceding wash but it made the clouds much more prominent against the blue. Use it where you want a decisive, opaque or semiopaque bold mark.
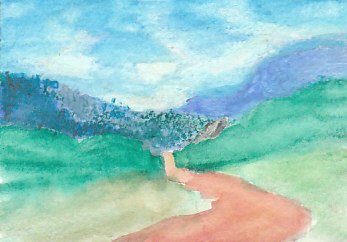
I also used the same wet effect, dipping the stick, to lay some purple shading into the far right hill and some blue green forest into the far left hill. Both of these areas were bland in the underpainting but I knew I would detail them as I went. The far right hill is farther back than the far left, the hills alternate as I envisioned it when I did the underpainting. Notice that dotting with the damp blue-green stick produced some interesting loose sticky textures where the trees thin out. The dots produced by wet-stick pointillism have a different look than dots pressed in with a dry stick. I also used a light brown and Naples Yellow, a very pale earth yellow, to put another stretch of road going over the far left hill. This helped create more of a zigzag path for the road than it running right up the center and improved the composition. The opacity of the dipped-stick wet effect made it easier to put a strong light color over a contrasting dark high intensity green.
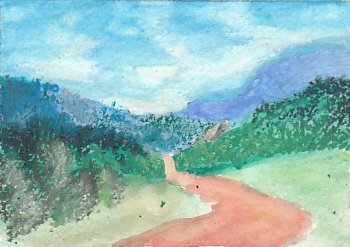
In the fourth stage I prepared for more wet effects by adding layers of dry application. I built up some dark forest with my darkest green over the middle ground and drew heavily over the middle ground grass on the right. I filled the left side middle ground hill with forest after doing some foreground trees to break the symmetry of the composition. Symmetry makes a dull composition. By putting more trees to the lower left, I created a diagonal area of dark that slants upward as it goes to the right, making tho whole landscape more lively.
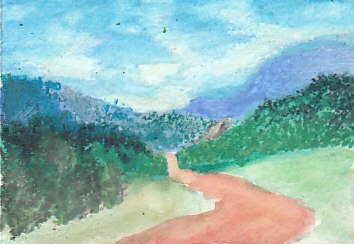
I used the same wet effects I did in the sky for the middle ground. Dipped my Size 6 round watercolor brush in clean water and then carefully worked each color area separately, keeping the foreground trees distinct from the darker forest behind them. The green of the middle ground hill on the right smoothed and became richer without completely losing its texture. Highlights on the foreground trees darkened so in the final stage I'll restore them using brighter yellow greens over what's there.
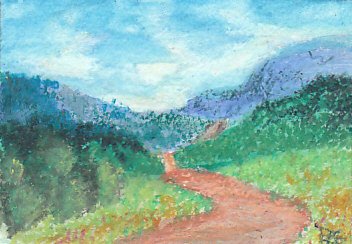
In the final layer in the foreground, I abandoned further wet effects to create a texture difference between softer washed background and middle ground to a nearly pointillist foreground. I added new highlights to the foreground trees and worked over the grassy near hill with yellows, greens and yellow greens. I worked on the road with pale browns and Naples Yellow, letting a little of the other colors track into it so that it'd be natural. I added some wildflowers by pointillism, just patches of yellow, orange and pink dots between the dotted foliage of the fields. I touched up any areas that needed work and added my signature. The difference between this image and the one I showed at the top is that I adjusted the top image using Gimp to come out truer to the brilliant colors of the little painting. Gimp is a free digital art and photo manipulation program that you can download at Gimp.org for Windows PCs. I believe there are versions for Linux and Macs as well, certainly for Linux as it's open source software developed for Linux users. I hope you've enjoyed this first demonstration of Wet Effects. I will probably do another article exploring various oil painting mediums with nonwatersoluble oil pastels -- but whatever medium you use with any brand of oil pastels, the techniques are the same. You can take color from the stick with a wet brush and paint directly with it, treating it like a watercolor pan. You can draw on your artwork and then wash over it with a clean wet brush. You can dip the stick into water or medium and draw with it. Try all of these wet effects on practice pieces of watercolor paper or design a painting incorporating each of them to its best effect. Enjoy!
|


