Crumb Control


Oil pastel crumbs smear in the worst places.
Crumb control is one of the biggest challenges in painting or drawing with oil pastels. They're sticky. They're tiny and may fly halfway across the page -- inevitably to a light, bright or contrasting color where they'll smear or blend in to muddy it. You can see plenty of these crumbs on my sketches, where I don't bother cleaning them up because they're sketches intended to be rough.
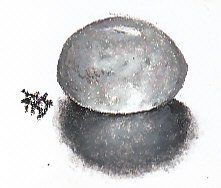
Above is an oil pastel study I did of a polished quartz pebble backlit with sunlight. It's relatively clean because I used a size 2 Cup Chisel Clay Shaper to gently press every crumb back into the place it came from. The one crumb that shows in the scan wasn't on the art, just the scanner glass.
I lifted crumbs off the white bare paper around it with a kneaded eraser pressed into almost a knife edge. I pressed it lightly on the crumb and lifted, then repeated again if there was still a mark two or three times. After I lightened it as far as I could go, I gently rubbed back and forth to lift out the last of the stain. Heavy rubbing or a finger smudge can make crumb smears indelible.
Kneaded erasers are my best method of crumb control for bare paper. It takes some practice to know exactly when to rub after pressing, and when to give it up as a bad go. One way to get it is to try cleaning up areas on sketchbook pages with each method before trying to apply it to crumb control on a serious artwork.
Even so, a crumb got onto the scan because it stuck to the glass of my scanner and I didn't see it. Crumb control doesn't end with a clean artwork, it's important for anything that touches the art too.
Whenever I scan any oil pastel drawing, I use a soft rag to clean the glass and scrub hard over every inch of it. Every few scans, I put some Bestine rubber cement thinner or odorless turpentine on the rag and wash the glass as well as the white pad under the lid of the scanner. Some crumbs get stuck to that and my first washing stained it in a couple of places because the crumbs were so big!
When I spot oil pastels on the keys of my laptop keyboard, I use a cotton swab to pick them off before I get them ground into my fingers. Clean hands are important to avoid turning crumb control problems into big finger-smears on bare areas, though those may also sometimes be erasable with a kneaded eraser if I am gentle enough with it.
Some brands of oil pastels generate more crumbs than others. Crumb control by brand choice is part of my overall strategy. Pentel is one of the better cheap ones for not leaving many. Holbein Academic has very fine crumbs easily blown off and relatively few of those. Neopastel generates relatively few crumbs but they are very soft, easily pressed back into the paint layer with a light touch.
Always try a light touch with an oil pastel stick or blending tool before trying finger blending or anything else to deal with crumbs. The less pressure, the better. Sometimes using a colorless blender to rub crumbs down into the paint layer can spread them and eliminate color contrasts.
Tortillons or stumps can be used for crumb control the way I used my Clay Shaper to blend crumbs back into the surface of your painting. The biggest difference is that you'll need to keep separate cardboard blenders for each color group. Stumps are the double-ended sturdy ones, tortillons the cheaper hollow one-end blenders, both are gray rolled heavy paper and available at art supply outlets.
I like the Colour Shapers better for crumb control because they can be washed and reused indefinitely and I don't have to put it down and look for the red stump to pick up the red crumb that was right next to the green one.
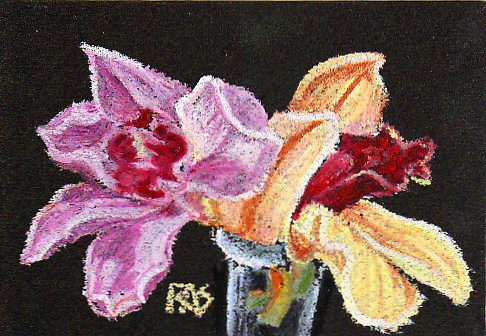
On some styles, crumb control may not be a problem. They can add to the texture of something loose and give it a distinctive look, like the orchids study I did below with Loew-Cornell oil pastels. Loew-Cornell is one of the more crumb-generating brands, but otherwise soft, opaque and easy to use.


One surefire way to get rid of the crumbs if you don't want them visibly sticking out to leave small shadows within a heavily worked area is to give that area a light wash with an oil medium, or for watersolubles, water. Don't use as much as you would if you wanted to dissolve the layer to create a full on painted look. Blot your brush almost dry and gently draw it across the area to both pick up crumbs and dissolve the small ones, then let it dry.
It takes some practice to do this just for crumb control without giving it a painterly look, but you may want that painterly look anyway. For dry smoothing, I'd stick to the Colour Shaper approach or some other burnishing tool.
When crumbs are stuck into areas of contrasting color, avoid going over them with the next color. Carefully scrape it out with a toothpick, Colour Shaper or scraper like my handy favorite nail cleaning blade on my nail clippers. If you lift off more color than just the crumb, it's easier to replace that than it is to blend in a speck of dark color into white or green into red or any other contrasting crumb. Once it's blended, most oil pastels are not opaque enough for full coverage.
You can scrape streaks out and try going over them heavily again. If it's in an important area, it may be worth trying.
When I have a muted color area and a crumb lands, sometimes I just blend it in place even if it's a strong contrast or a complement. Adding more of the color that was under it and working outward to smear it over as much area as possible gives it the kind of light shifting hue change that I did often working on my quartz pebble.
It helped to work gradually from dark to light on that study so that I could blend only the next level of value into it. I used all the grays first and added color later, putting light green over a dusty rose, light blue into some of the grays and mixing lavender with yellow gray.
That kind of mixed-neutral allows a lot more ease in crumb control. Whatever drops into it, you can blend it in and then add a few touches of the same odd hue here and there so that it's not the only spot with that mixture. If crumbs get into the shadows of something, it's easier to blend them in and adjust the mix because shadows are usually more muted than highlights anyway.
When getting hard edges like in my quartz pebble, it's good to work near but not quite over the line and finish pushing the color out to the hard edge with a Colour Shaper. This is important in realism, where hard edges on some details are part of what makes it plausible.
Crumbs going into areas you know you'll cover with dark color may just get worked over. I don't bother with crumb control if I know it will get blended in on the next pass or layer and covered. It matters most when darks fall on light or white, or bright strong staining colors go into complements.
Crumbs on bare areas of Colourfix paper or Colourfix primed paper or anything that's gessoed or primed may be able to be washed off. Remove as much as you can with a kneaded eraser, then dip a cotton swab into thinner and dampen it. Spread out the wash and dab it up fast with a clean cloth or paper towel. Repeat a couple of times till it runs completely clean, using a fresh swab rather than the stained one.
That only works with surfaces that aren't absorbent. Watercolor paper, most boards and sketch paper will just take a liquefied stain down into the fibers where it'll never get out. If you can reduce it that way and don't want bare paper, going over it with the right colors after it's dried would keep it from migrating up into the new layers of oil pastel.
With each brand of oil pastels, some types of strokes create crumbs more often. Heavy pressure increases the crumbliness, but with some brands even a light sketchy broken line tears up the tip of the stick and sprays crumbs.
A subtle, effective way to deal with crumbs that aren't too far from the area of color they belong in (in value or hue) is to get everything done, then in a finishing pass very lightly press the tip of the right color stick down on the crumb. This presses it and blends it down into the paint layer. It's more effective in heavy applications than broken lines and loose patches where the dots of crumb pressing would become their own marks.
That last takes a bit of practice but it's the subtlest, easiest way to control crumbs with a medium soft oil pastel like Neopastel or a firm one. Try it with different brands. The trick isn't that hard once your hand learns it, but care and attention while doing the work is what keeps it polished. It's better to do this on the final layers of a multilayered area than on early layers when it wouldn't be important.
Rubbing the stick against the surface generates much more crumbling than tapping it, that's why using the stick to blend crumbs back in can work without generating still more crumbs. Sometimes the crumb just sticks to the stick and most of it comes off, other times it's pressed down into the surface. If it's the same color it doesn't matter which happened.
Important Tip on Crumb Removal
If the crumbs are laying all over the background or bare surface and you don't want to take the time to carefully lift each one, do not brush them off. Unlike soft pastel dust, they will streak and grind into the surface making separate permanent marks if you brush them away with hand or a brush or a rag.
What works for fast and simple crumb control is to turn the art upside down and bang on it a couple of times to knock crumbs away directly down into the trash can. Or hold it at an angle and blow across the art. I haven't tried using the canned air blower that I clean my keyboard with, but that's also a possibility for removing small blown crumbs without streaking the paper.
Good luck on crumb control. It takes patience and attention. I use all of those methods and sometimes don't bother if what I'm doing is a study or a color chart and I am not trying to create polished finished artwork that time. Other times I'm doing something loose and like the look of the little specks that stick up from the surface as much as I like the flecks of background showing through medium and light applications.
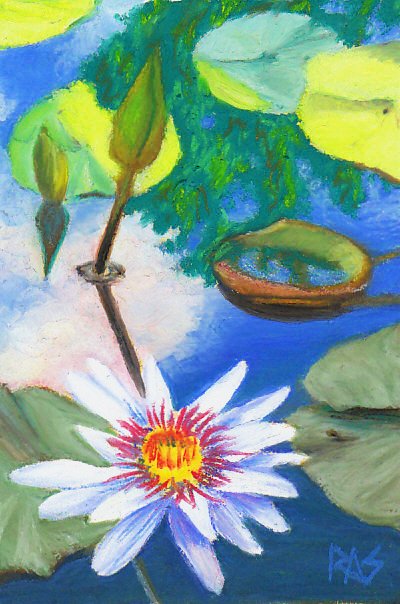
In serious realism like Water Lily Pond, I slow down and take my time removing or pressing in every crumb that I can, so as to keep a smooth paint surface with accurate lines and gentle transitions. Crumb control is time consuming and takes patience, but you can reduce the irritating specks that land over the finished areas of your art.
